 Pin It
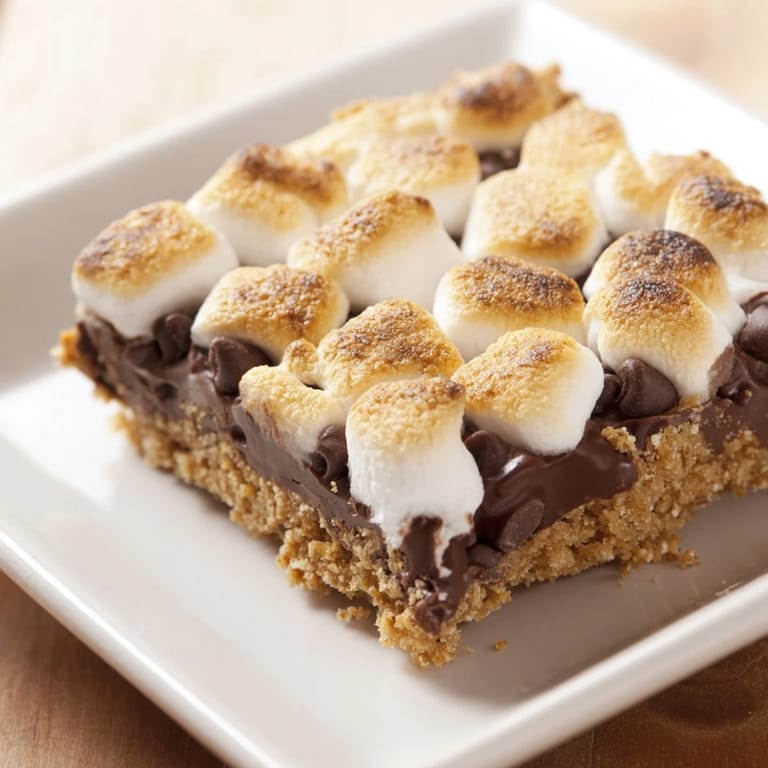
 The first time I made s'mores bars, I wasn't trying to recreate campfire magic—I was just tired of sticky fingers and marshmallows sliding off graham crackers onto the ground. It was a rainy weekend, no fire pit in sight, and my nephew was disappointed. So I thought: why not bring the whole experience indoors, baked into something you could actually hold without a napkin in each hand? These bars turned out to be even better than the original, with that perfect ratio of chocolate and marshmallow we all chase when roasting over flames.
I remember my sister texting me a photo of these bars at her daughter's school bake sale, completely sold out by second period. That's when I realized this recipe wasn't just convenient—it was genuinely beloved. Now whenever someone asks me for an easy dessert that feels special, these are what I make.
Ingredients
- Graham Cracker Crumbs (1 1/2 cups): These form the foundation, and using actual graham crackers you crush yourself tastes so much better than pre-made crumbs—they stay fresher and have better texture.
- Unsalted Butter (1/2 cup, melted): Melted butter distributes evenly through the crumbs, creating that toasted, slightly crispy crust that holds everything together.
- Granulated Sugar (1/4 cup): This small amount adds just enough sweetness to balance the richness without making the crust cloyingly sugary.
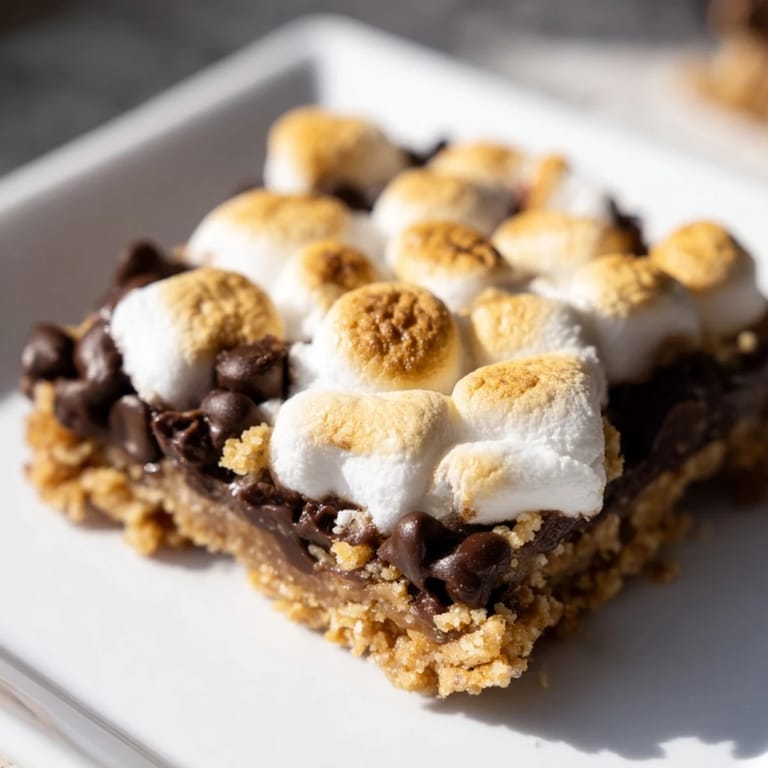
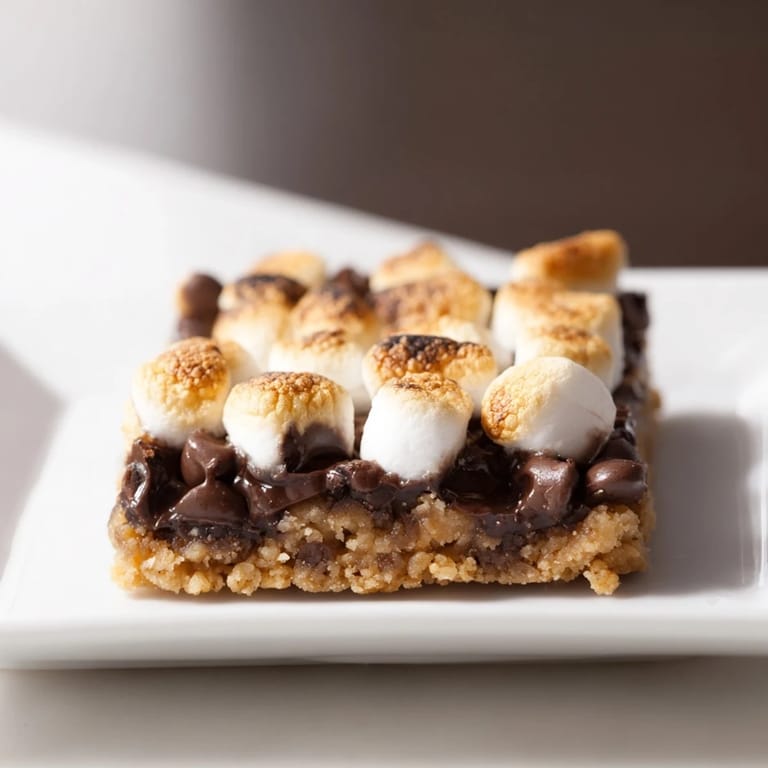
- Semi-Sweet Chocolate Chips (1 1/2 cups): Semi-sweet hits that sweet spot between milk chocolate's simplicity and dark chocolate's bitterness—it's the campfire classic for a reason.
- Mini Marshmallows (3 cups): Mini marshmallows toast more evenly than large ones and distribute throughout each bite, so you're never stuck with a bar that's all marshmallow or all chocolate.
Tired of Takeout? 🥡
Get 10 meals you can make faster than delivery arrives. Seriously.
One email. No spam. Unsubscribe anytime.
Instructions
- Heat Your Oven and Prep the Pan:
- Set your oven to 350°F and line an 8x8-inch pan with parchment paper, leaving extra hanging over the edges so you can lift the whole thing out later. This one small step saves you from wrestling with a knife to scrape bars from the corners.
- Make the Crust:
- Mix your graham cracker crumbs with melted butter and sugar until it looks like wet sand, then press it firmly and evenly into the bottom of your pan. Use the bottom of a measuring cup to flatten it—you want an even layer so every bar bakes the same.
- Toast the Crust Base:
- Bake this for 8 minutes to set it slightly and toast it just enough to smell incredible. You're not looking for color, just that golden, slightly crispy texture underneath.
- Add the Chocolate:
- Sprinkle chocolate chips over the warm crust and pop it back in the oven for just 2 minutes—the residual heat will soften them without melting them into a puddle. Spread them with a spatula while they're still pliable so you get an even layer.
- Top with Marshmallows:
- Press the mini marshmallows gently into the chocolate layer so they don't just sit on top waiting to fly off. You want them to nestle into the chocolate just enough to stay put.
- Toast Until Golden:
- Bake for 10-12 minutes until the marshmallows turn that perfect golden brown color with hints of char. Watch them the last couple minutes—they go from perfect to burnt faster than you'd think.
- Cool and Cut:
- Let them cool completely in the pan, then refrigerate for at least an hour so the layers set up and you can make clean cuts. Use the parchment paper to lift them out, then slice into 16 even bars.
 Pin It
 There was this moment at my nephew's birthday party when he bit into one of these bars and went completely silent for a few seconds. Then he said, "This tastes like camping, but better," which honestly felt like the highest compliment I've ever received for any recipe I've made.
Variations to Try
Once you nail the basic version, you can play around without losing that s'mores identity. Sea salt sprinkled on the crust adds a sophisticated edge, milk chocolate makes them sweeter for kids, and dark chocolate appeals to people who find semi-sweet too sugary. I've even swapped the graham crackers for digestive biscuits when I was out of them, and honestly, nobody noticed or cared—the marshmallow and chocolate were the real stars.
Storage and Serving Tips
These keep covered on the counter for two days, in the fridge for a week, and they freeze beautifully for up to a month if you want to make them ahead for unexpected guests. Serving them slightly warm makes the chocolate gooey again and reminds you exactly why you loved s'mores in the first place.
Why These Bars Changed My Dessert Game
For years I made the same handful of desserts because I knew they worked. But these bars proved that sometimes the best recipes are just the ones you needed at the exact right moment—something that solved a problem (messy campfire snacks) while still delivering pure comfort. Now I make them for almost every occasion, and they've become one of those recipes people specifically ask me to bring.
- They're ready in under an hour from start to finish, which fits real life way better than most homemade desserts.
- The combination of textures—crispy crust, melted chocolate, toasted marshmallow—is honestly more interesting than eating an actual s'more.
- Everyone, from picky kids to fancy dessert people, genuinely loves these with zero complaints.
 Pin It
 These bars are proof that sometimes the best way to capture a feeling isn't to chase it exactly as it was, but to make it better, easier, and more shareable. Once you make them, you'll understand why.
Recipe FAQs
- → What is the best way to bake the graham cracker crust?
Bake the crust at 350°F for 8 minutes to set it firmly. This helps create a sturdy base that won’t crumble when topped.
- → Can I use a different kind of chocolate for the middle layer?
Yes, milk chocolate or dark chocolate chips can be substituted to adjust sweetness and richness to your preference.
- → How do I get the marshmallows toasted evenly?
After adding marshmallows, bake the bars for 10-12 minutes until the marshmallows puff and turn golden brown, watching carefully to avoid burning.
- → Is it necessary to chill the bars before cutting?
Chilling the bars for about an hour in the fridge firms them up, making it easier to slice cleanly without sticking.
- → What can I add to enhance the flavor of the crust?
A pinch of sea salt or swapping graham crackers with digestive biscuits adds a richer, more complex taste to the crust layer.