 Pin It
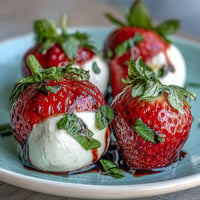
 Last Easter, I found myself standing in a Dubai spice market, mesmerized by the shimmering gold leaf adorning every dessert window, and it struck me that luxury doesn't have to mean complicated. Back in my kitchen weeks later, I wanted to recreate that feeling of indulgence in something I could hold in my hand, something that crackled when you bit into it. These strawberry-chocolate eggs came together almost by accident, born from leftover hazelnut spread and a bag of crisped rice cereal that had been calling out for purpose. The first time I cracked one open, the filling tumbled out in the most satisfying crunch, and I knew I'd stumbled onto something worth repeating.
I made a batch for my coworker's daughter's birthday, and watching her face light up as she discovered the hazelnut and rice hiding inside was worth every minute of careful layering. She immediately asked if she could help me make more, and we ended up in my kitchen on a rainy Sunday afternoon, her small hands learning to steady the pastry brush, my hands guiding hers through the motions. By the time we finished, we'd made twice as many as planned, and the kitchen smelled like melted chocolate and possibility.
Ingredients
- High-quality white chocolate (300 g): This is where you really notice the difference; cheaper chocolate can taste waxy and won't set properly, so invest here and taste the gap.
- Freeze-dried strawberry powder (1 tbsp): It dissolves invisibly into the chocolate while giving you that authentic berry flavor without introducing moisture that could ruin your shell.
- Red or pink food coloring (optional): A single drop goes surprisingly far; add it gradually while stirring or you'll end up with hot pink eggs instead of blushed ones.
- Milk chocolate (80 g): Melts beautifully into the hazelnut spread and creates the perfect binding agent for everything that comes after.
- Hazelnut spread (70 g): This is your flavor anchor; the nuttiness pairs gorgeously with strawberry and plays beautifully against the crisped rice texture.
- Crisped rice cereal (40 g): The hero ingredient that transforms this from mousse into something with real personality and bite.
- Chopped roasted hazelnuts (30 g): Roasted ones make all the difference; raw hazelnuts taste flat and forgettable by comparison.
- Vanilla extract (1/2 tsp): Just enough to round out the hazelnut flavor without making it taste like vanilla pudding.
- Edible gold leaf (optional): For when you want these to feel genuinely celebratory.
Tired of Takeout? 🥡
Get 10 meals you can make faster than delivery arrives. Seriously.
One email. No spam. Unsubscribe anytime.
Instructions
- Melt your white chocolate gently:
- Use a double boiler if you have patience, or microwave in 15-second bursts if you're like me and want results faster. The moment it's smooth and silky, stop heating it completely or the texture changes in ways you can't undo.
- Create your strawberry chocolate:
- Whisk in the freeze-dried strawberry powder first, letting it distribute evenly through the white chocolate before adding color. You're aiming for that blushed rose tone, not cotton candy.
- Build your shells with patience:
- Paint or spoon the chocolate into your silicone molds using firm, even strokes that coat the bottom and sides completely. After that 10-minute chill, do it again; this second layer is what gives you a shell strong enough to hold your filling without cracking.
- Make your crunch filling:
- Melt the milk chocolate, then fold in the hazelnut spread while it's still warm so everything combines smoothly. Once you stir in the crisped rice and hazelnuts, the filling should be thick enough to hold its shape but still spreadable; if it's too thick, warm it slightly.
- Fill with intention:
- A spoon works fine, but a piping bag with the tip cut off gives you control and prevents overfilling. Leave a small border of empty shell space, or your seal will be sloppy and the filling will squeeze out when you press the halves together.
- Seal your eggs with warmth:
- Gently warm just the edge of your second chocolate half with your finger or a warm knife, then press down firmly for a few seconds. If there are visible seams, drizzle melted chocolate along the crack and smooth it with a spatula or knife while it's still soft.
- Add your finishing touch:
- Brush on edible gold leaf while the chocolate is still slightly tacky, or wait until everything is set and drizzle white chocolate in delicate lines. Either way, let them chill one final time before you serve them.
 Pin It
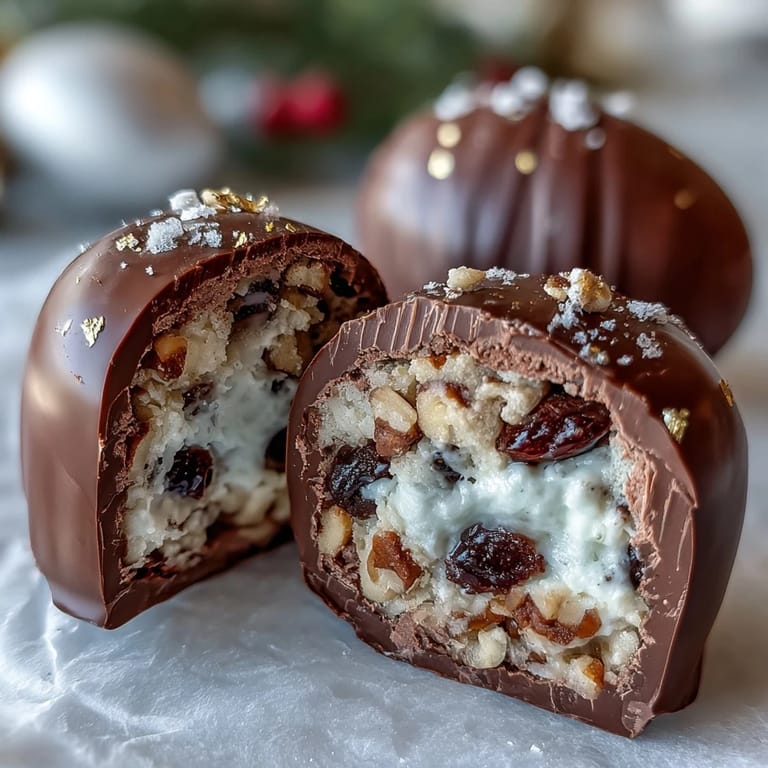
 There's a moment when you press those two halves together and realize you've created something complete, something that feels worthy of being wrapped in tissue paper and handed to someone special. That small victory of sealing it properly, of watching the chocolate smooth over the seam like it was always meant to be one egg, reminds you why you cook in the first place.
When to Make These
Easter is the obvious answer, but these eggs deserve an audience beyond one holiday. I've made them for baby showers, tucked them into fancy gift boxes, assembled them the night before dinner parties when I needed something that looks restaurant-quality but won't stress me out during cooking. They actually improve after a day or two in the fridge as flavors meld and the filling sets into an almost fudgy consistency.
Troubleshooting Your Shells
Sometimes your first layer of chocolate won't stick to the mold, sliding off instead of coating evenly. This usually means your mold wasn't completely dry or your chocolate was too warm. The second layer almost always works perfectly because the first layer gives the chocolate something to grip. If you end up with a shell that's too thin, peel it out gently, wipe your mold, and try again with a slightly cooler chocolate.
Making Them Your Own
Once you understand the basic structure, you can play endlessly with fillings and flavors. I've tried dark chocolate shells with pistachio filling, added dried cranberries to the crisped rice, even experimented with a white chocolate and lemon version that was surprising and bright. The beauty of making these at home is that you get to decide what luxury tastes like to you.
- For nut-free versions, swap hazelnut spread for sunflower seed butter and skip the hazelnuts entirely without any other adjustments.
- Ruby chocolate creates a gorgeous blush tone for your shells and pairs surprisingly well with strawberry filling if you want to skip food coloring entirely.
- Store these in an airtight container in the fridge for up to a week, though they rarely last that long once people know they exist.
 Pin It
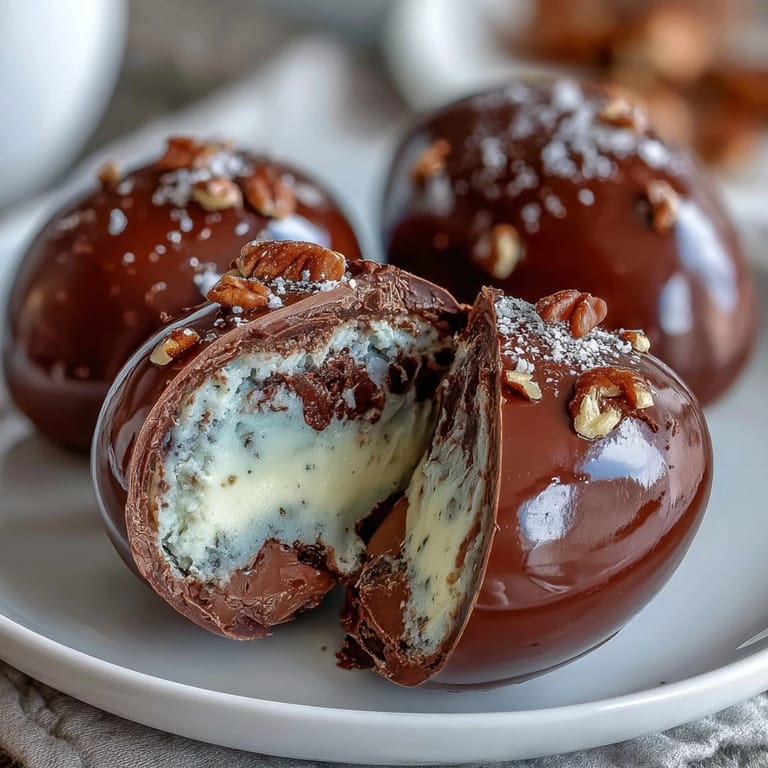
 These eggs remind me that the most impressive gifts are often the ones made with your own hands and served with a story attached. Every time someone bites into one, you're sharing not just chocolate and hazelnuts, but the small joy of effort and care.
Recipe FAQs
- → How do I achieve a smooth strawberry flavor in the chocolate shell?
Melt the white chocolate gently and mix in freeze-dried strawberry powder thoroughly to ensure an even, natural berry taste throughout the shell.
- → What is the best way to make the chocolate shell sturdy?
Apply multiple thin layers of the strawberry chocolate using a pastry brush, chilling between coats, to create a durable and even shell.
- → Can I substitute nuts in the crunchy filling for allergies?
Yes, hazelnuts can be replaced with sunflower seed butter and the chopped nuts omitted to maintain texture while avoiding allergens.
- → How should the eggs be sealed to prevent filling leakage?
Warm the edges of another chocolate shell half slightly before pressing it onto the filled half, then smooth seams with melted chocolate for a secure seal.
- → Is it possible to use different chocolate types for the shell?
Dark or ruby chocolate may be used instead of white chocolate to offer a unique twist in flavor and color, although preparation may vary slightly.
- → What tools are recommended for shaping these eggs?
Silicone Easter egg molds work best for shaping, along with a pastry brush for coating and a spatula or spoon for filling.